This project started for a game prototype for which I wanted a completely unified dynamic lighting system. I.e. all of the lighting--direct, indirect, and shadows, is produced coherently from the same source in a pseudo-physical way. This was mostly for game design reasons, but there's also a simplicity and elegance to the concept that I found very appealing.
The basis for the idea came from an article by Inigo Quilez, which details a classic, incredibly simple scheme for GI. The basic description of this is that each vertex, or point, calculates its irradiance by rendering a hemisphere of the scene aligned to the vertex normal (through rasterization) and accumulating the color. The color of that vertex will then be used for the next "bounce" of light by other vertices. The initial "light sources" for the scene are emissive--they're just initialized with a constant radiance (vertex color). Iterating this produces a visually compelling global illumination. Albeit not "physically accurate" without more work, it is a very "pseudo-physically accurate" method in that it is completely systematically coherent, with all of the lighting generated through the same, simple iterative process. There is only one type of light, which is in terms of typical lighting systems an emissive mesh, and zero systemic divisions like a pure ray-tracer. This is the kind of thing that was appealing to me.
I first built out this simple method, more or less exactly as described by IQ, to test with one of my prototype landscapes (I'm primarily interested in landscape-scale lighting, here). I used his suggestion to apply a spherical projection in the vertex shader, as although my goal here wasn't (earthly) physical accuracy, I found it reasonable and felt the results looked much nicer visually.
Here's some screenshots from my initial experiments to see what I'm talking about hopefully. I apologize for the strange work in progress environment art throughout this.


I found the physical coherency of the lighting at all scales in the environment, especially the occlusion, to be extremely compelling in giving a strong sense of space and form. The visual artifacts from this method, which you can mostly see in the direct lighting, are largely due to noise where the normal directions are at the threshold of rendering/not rendering the light source in its hemisphere, or any other case where noise is introduced in whether a bright light source is rendered or not (keep in mind that this is vertex shaded, so I'm disregarding those "artifacts" here). But one of the nice things about this method is that there is little "noise" right out of the box compared to ray-tracing. Each pixel in the render is effectively a sample of the scene, and is deterministic. Here I'm rendering at 32x32 pixels, so I'm doing 1024 environment samples per-vertex, effectively. I found this really promising, so I kept experimenting a bit more to see what I could do with it.
One of my biggest interests was seeing how I could handle foliage. This was pretty straightforward--for a translucent card, I render once from the front and once from the back, and double the mesh. By attenuating the "back illumination", this controls the amount of translucency. I make a much fancier translucency/in-scattering effect later when I get to clouds, but this worked well enough for cards.


I also made the leaves glow when I was messing around--why not! You can see how nicely this handles glowy emission, naturally.

Grass picking up the lighting from the landscape looks very nice with the natural soft shadows.

This proved to me well enough that I liked the results, but at this point I started to have an issue with speed, as I reached millions of vertices with my scene and it was taking a long time to bake the lighting. You'll notice that at this point, this is actually *extremely* inefficient. I'm serially sending through 1 million 32x32px renders to the GPU, going through the whole render pipeline for each one. I might as well not be using my GPU. Although even annoying for static baking at this point, you may have noticed at the beginning that I also wanted a "dynamic lighting system". Really, if I just wanted static GI, there are existing GI baking solutions I could have used for similar effect at this point. It was not, in fact, my plan to stick with a standard render pipeline from the beginning.
My intention was actually to see if I could use compute software rasterization to render a large number of views in parallel on the GPU. In addition to the fact that I'm not anywhere near using full occupancy of the GPU here (which there could be other solutions for), the triangles I'm rendering with this method are extremely small, as the *whole render* is 32x32px. This is well below the threshold that, in developing Nanite, Epic found that optimized compute software rasterization actually wins out over hardware rasterization. With all of the potential optimizations I saw for this, I ballparked that it could probably be fast enough for dynamic lighting.
Basic Structure:
To start with I wanted to keep things conceptually simple. Each group dispatch would handle one view, or sample point, and basically handle the whole "render pipeline". At a theoretical level, performance-wise I'm accepting a more complicated kernel with less execution path coherence, for not writing out any intermediate buffers to global and keeping everything in shared memory--though the latter introduces a bit of a challenge in itself too with respect to space. As I worked on it, the complication of this shader ended up ballooning a lot, and it's likely that some balance between these is actually the most efficient (but I haven't gotten to optimizing it at that level, yet). But anyway, the high level structure ended up something like this:
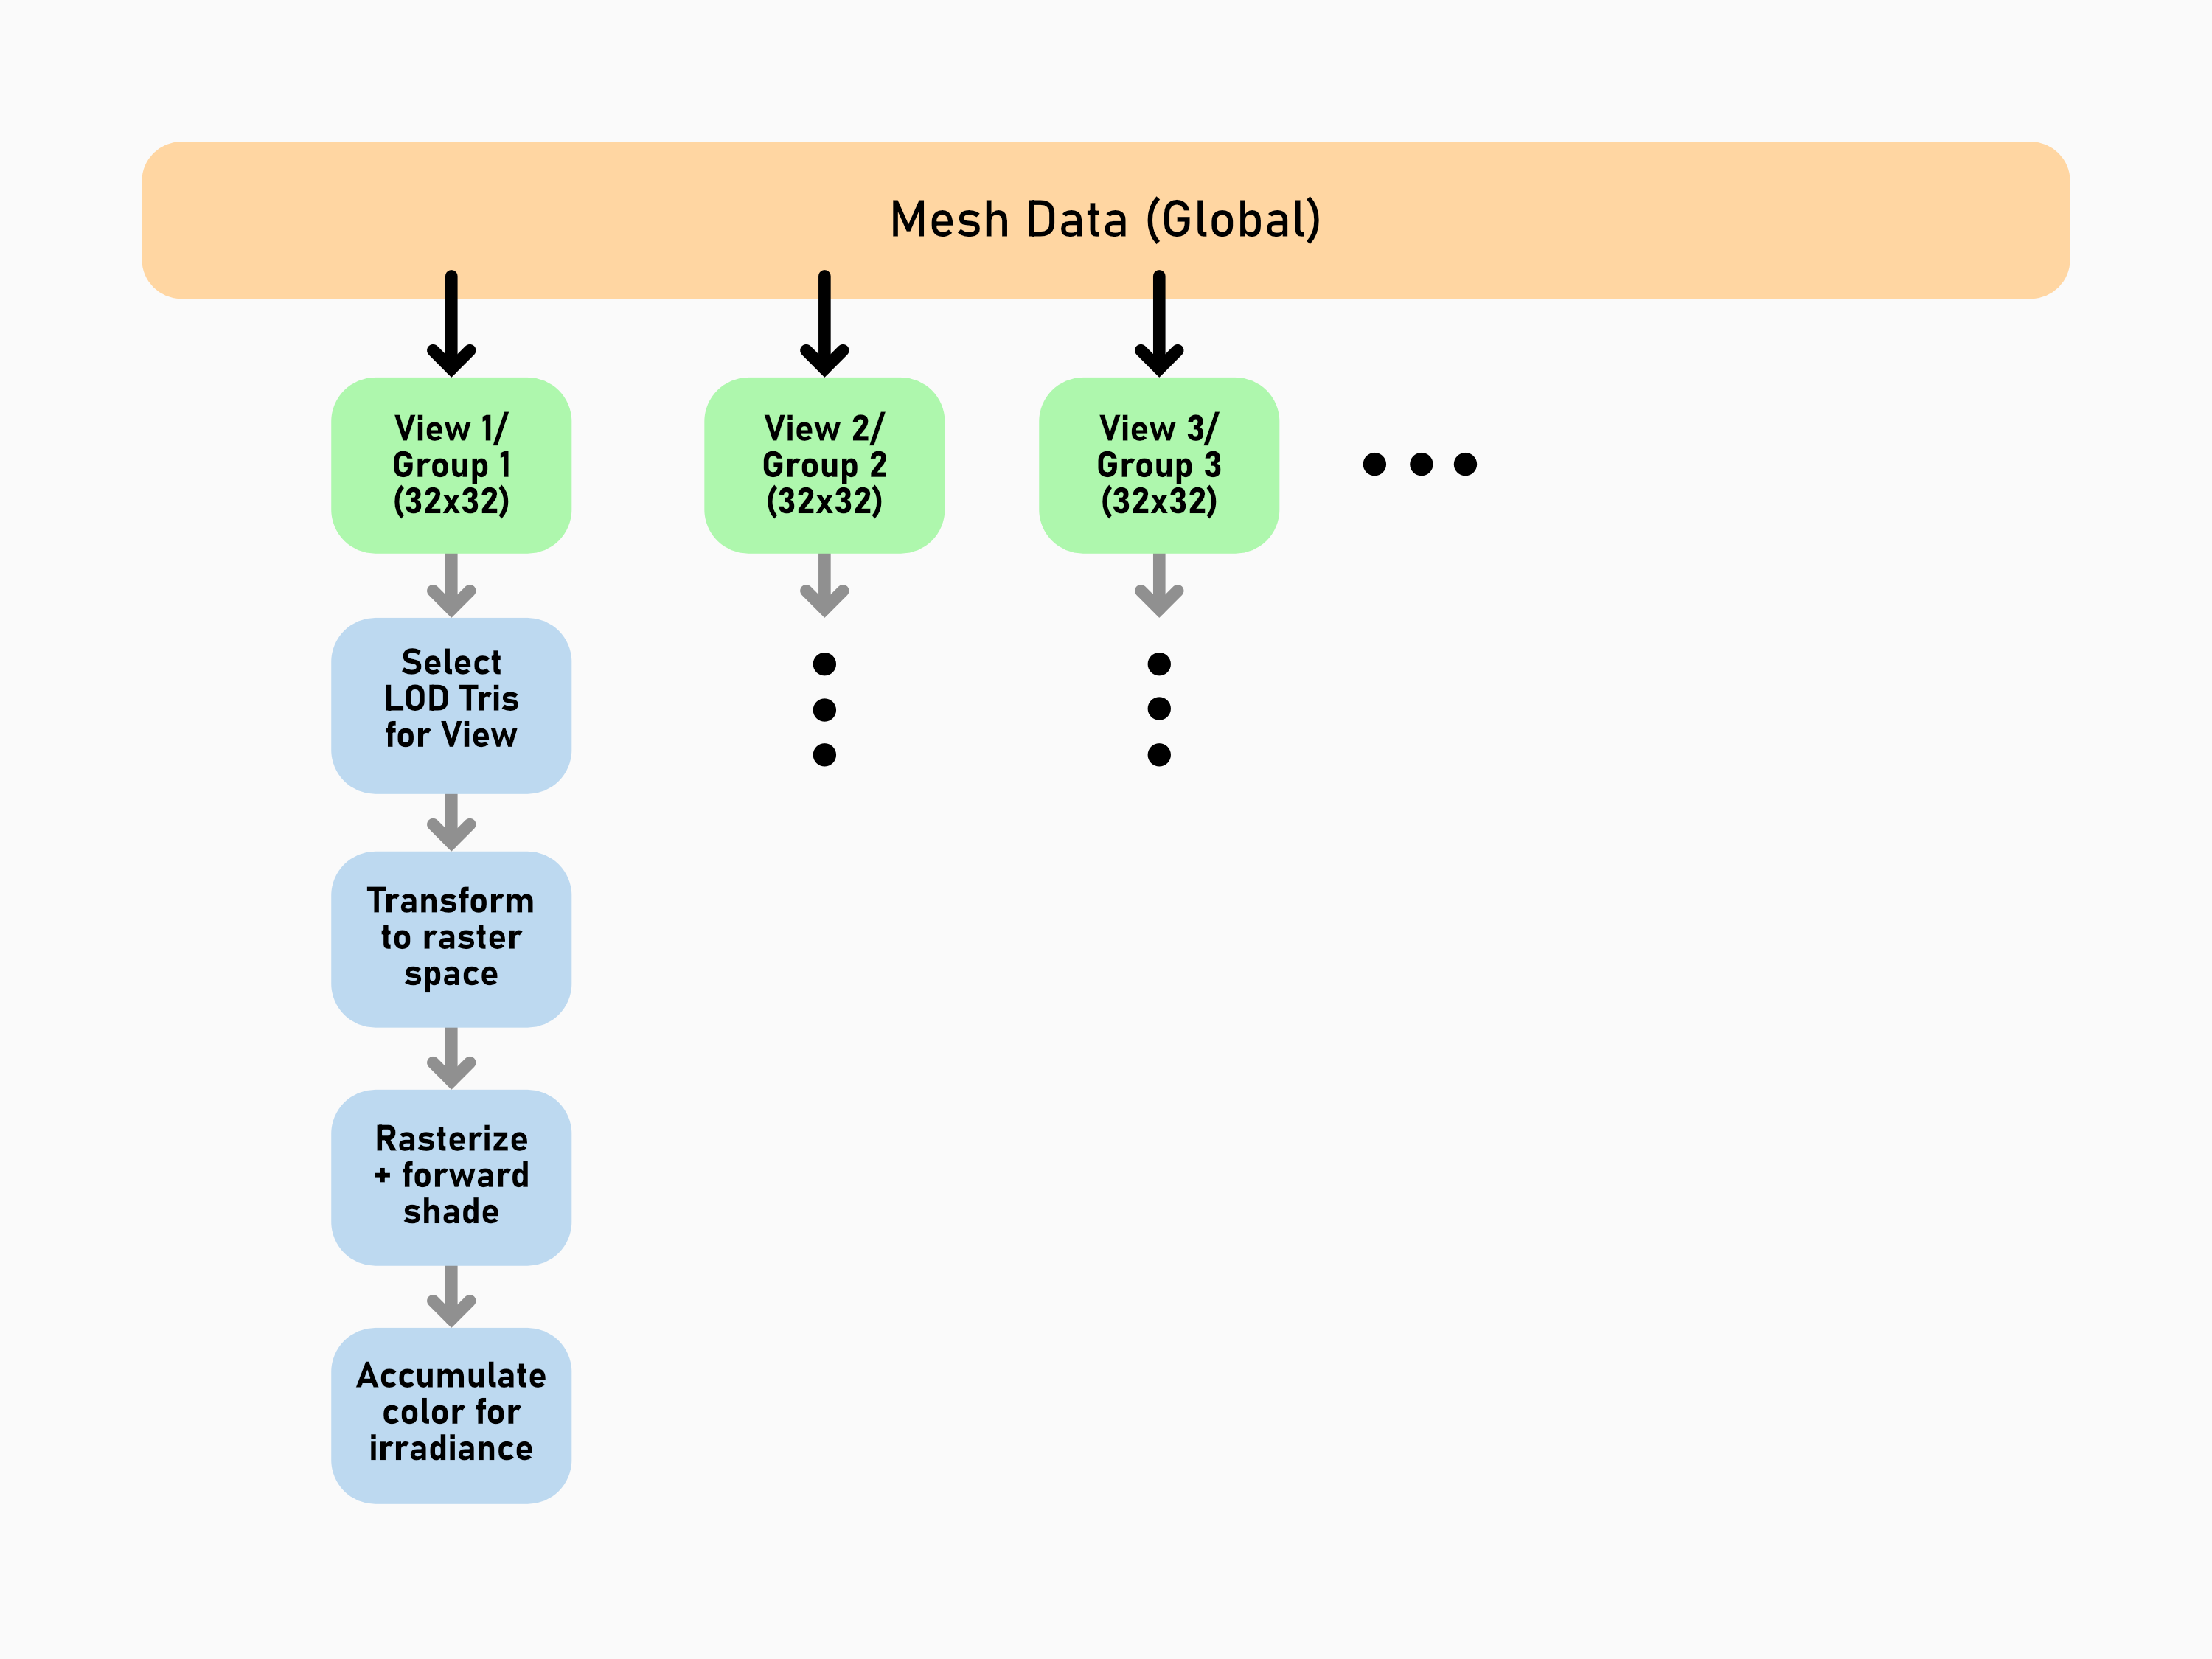
To go through this, it's not the order that I developed it necessarily, but to keep things clear I'll tackle each part of the pipeline step-by-step.
Triangle Selection
One thing that I knew I would need from the beginning is some kind of level of detail system, as an advantage of rendering these tiny views is that I can be pretty rough about things, and I don't want to render a bunch of microscopic triangles. I felt that taking advantage of a simplified scene representation and limiting the amount of detail that I'm rendering was one of the keys to making this work at all, so I considered it a priority for my "basic implementation".
As I'm doing this in a compute shader, I want to keep the algorithms very simple at least to start. One thing I've learned is that in practice, a simpler algorithm will often outperform a more *theoretically efficient* algorithm that doesn't take into account the realities of the hardware--you might as well start with it. The general idea I ended up with was that the triangles at each level of detail would reference the triangles at the level of detail below it. This is kind of my "acceleration structure", which is triangle-linked rather than spatial. This is similar to the triangle cluster idea Nanite uses for instance, though much simpler as I dont need to keep things super perceptually coherent.

The triangle density is "refined" by simply iteratively looping over the triangles at each level of detail, and either rendering the triangle if it's at the appropriate LOD, or passing it forward to the next iteration. To walk through the process for one view, it begins at the lowest (roughest) LOD. It loops over all of the triangles at this LOD, and if the closest point on any triangle is within the threshold distance for the LOD, it stores its index for the next pass to refine it. If it's outside of the threshold distance, then it's at the correct LOD and just passes it forward to the rasterization stage. To move to the next level of refinement, the index is stored in shared memory, so there's a limit on the number of triangles that can be passed forward at any level. In practice, I still haven't run into an issue with a buffer allowing for 2048 tris, but the LODs do need to be defined reasonably (tbh, exceeding this just indicates an issue there).
When it comes to the next pass, there's some slight technical trickiness here. The way it works at this stage is each thread is responsible for one triangle. However, I have a dynamic list of triangles to render at the next stage, as well as potentially more triangles than threads in my group. So, I need to map my current thread index to the triangle indexes my LOD tri points to in a unique way. Frankly I don't remember how the code works but apparently it does, and I thought it was clever at the time.
Anyway, the process continues the same way: if the triangles in this pass are at the correct LOD now, then they're rasterized, and if not they get queued for refinement. This continues until all the triangles that need to get rasterized are, and the kernel synchronizes that point.
At this point it's also important to mention the mesh/LOD data structure. I'm using a custom binary mesh format that I export my meshes from Houdini with (built in a couple houdini Python nodes). The LODs are as such that they all share the same points from the most detailed LOD--so in terms of point data, the data from the most detailed LOD is recorded, along with index lists that reference them for each LOD's triangles.
I am definitively not doing anything sophisticated for the clustering here, because that's a pain and I don't really need to right now. Anything that won't significantly impact a 32x32 px render doesn't concern me, and I don't want to make anything more complicated in the shader. This render is for the computer to look at, not a human, so I don't need to make LOD boundaries pretty and seamless. You can see my exporter in Houdini here as well as a visualization for the triangle clusters, wrapped in some auto-LOD functionality via remeshing/VDBs to make things easy for me.
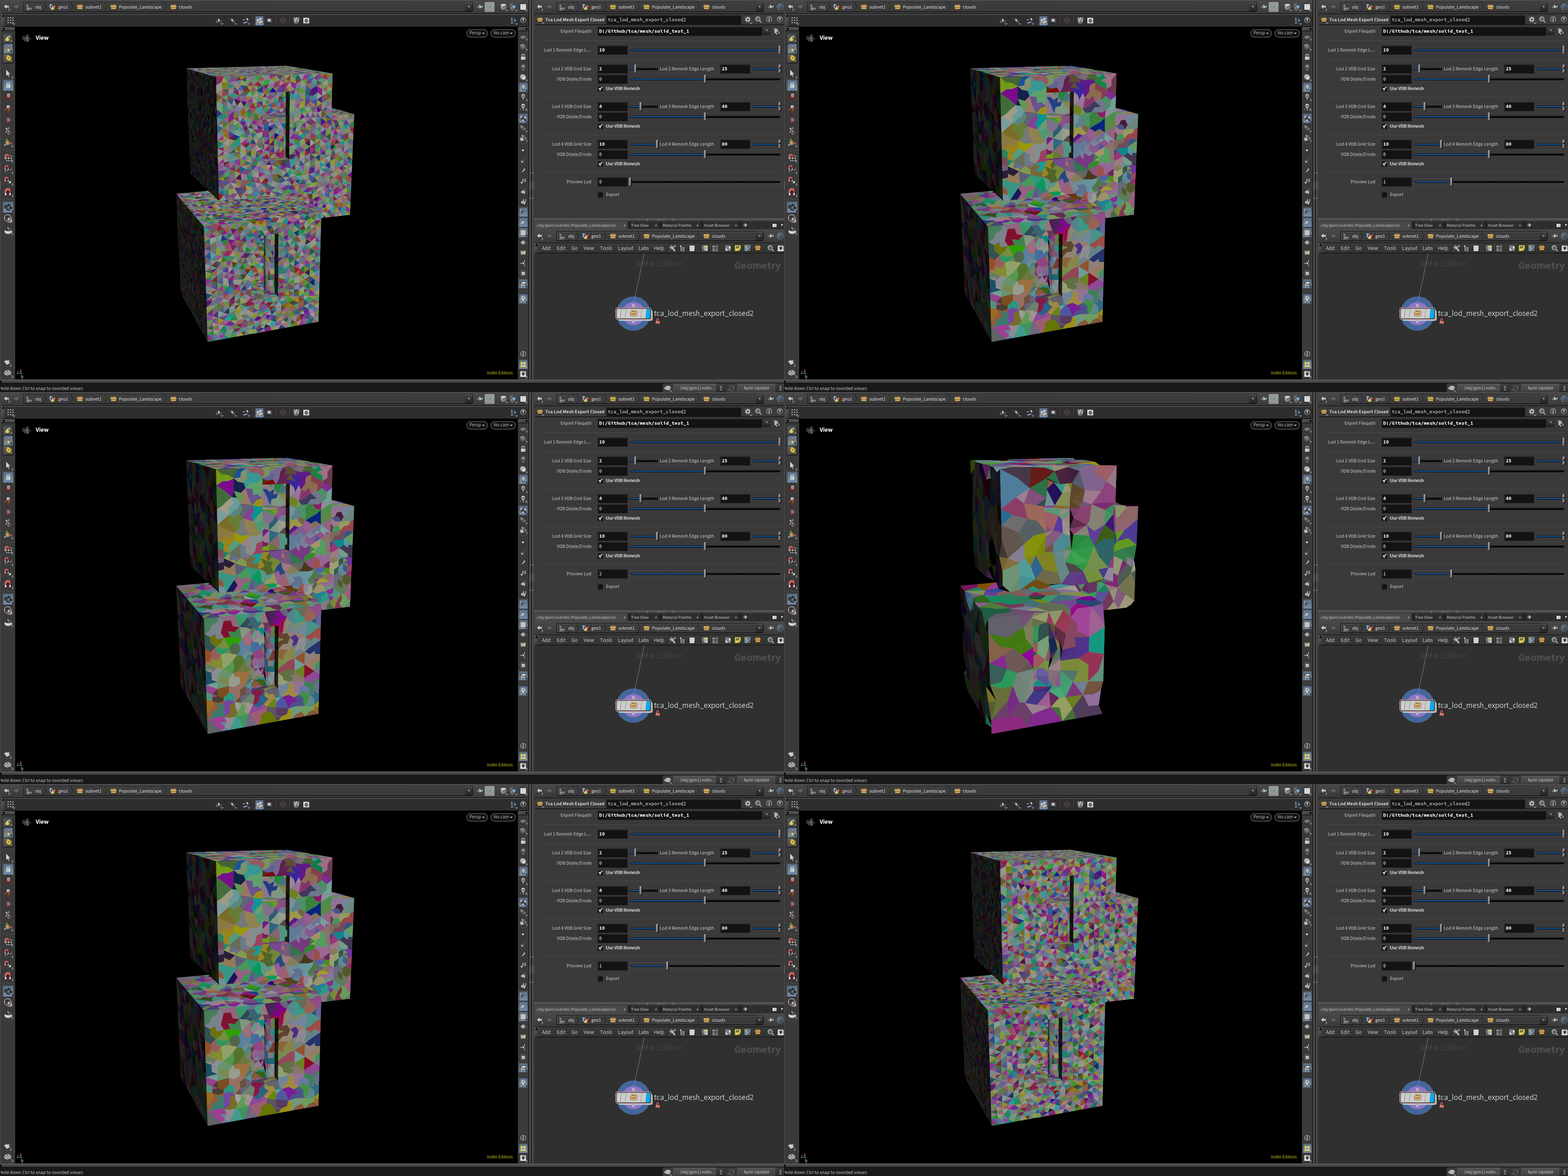
The mesh format consists of one file for all the point data, a LOD file which contains point indexes for the triangles for every LOD, and a file for various metadata.
Raster Space Projection
The triangles to render are just chosen via absolute camera distance (with behind-camera triangles culled), so projection comes afterward. This has actually been one of the trickiest parts of the rasterizer, entirely because of clipping. It turns out that, even with a shader-optimized algorithm, clipping all planes of the perspective projection slowed things down *a lot*. Unfortunately, you need to do clipping. Things are very messed up if you don't. After giving it some thought, I felt that it was kind of fruitless to try to raw optimize this at this point. Now, once again I'm not doing anything physically accurate here, nor am I trying to model a camera. I don't actually care about what the projection is as long as it has the qualities I want. And so, I don't need to use perspective projection in the first place, I can use whatever I want. I could use a faster projection more suited for this application that you don't have to clip on as many planes, or doesn't care as much if you don't clip at all. Since all I want to do is render a hemisphere, I could use... a simple spherical projection, for instance, which is what I did.
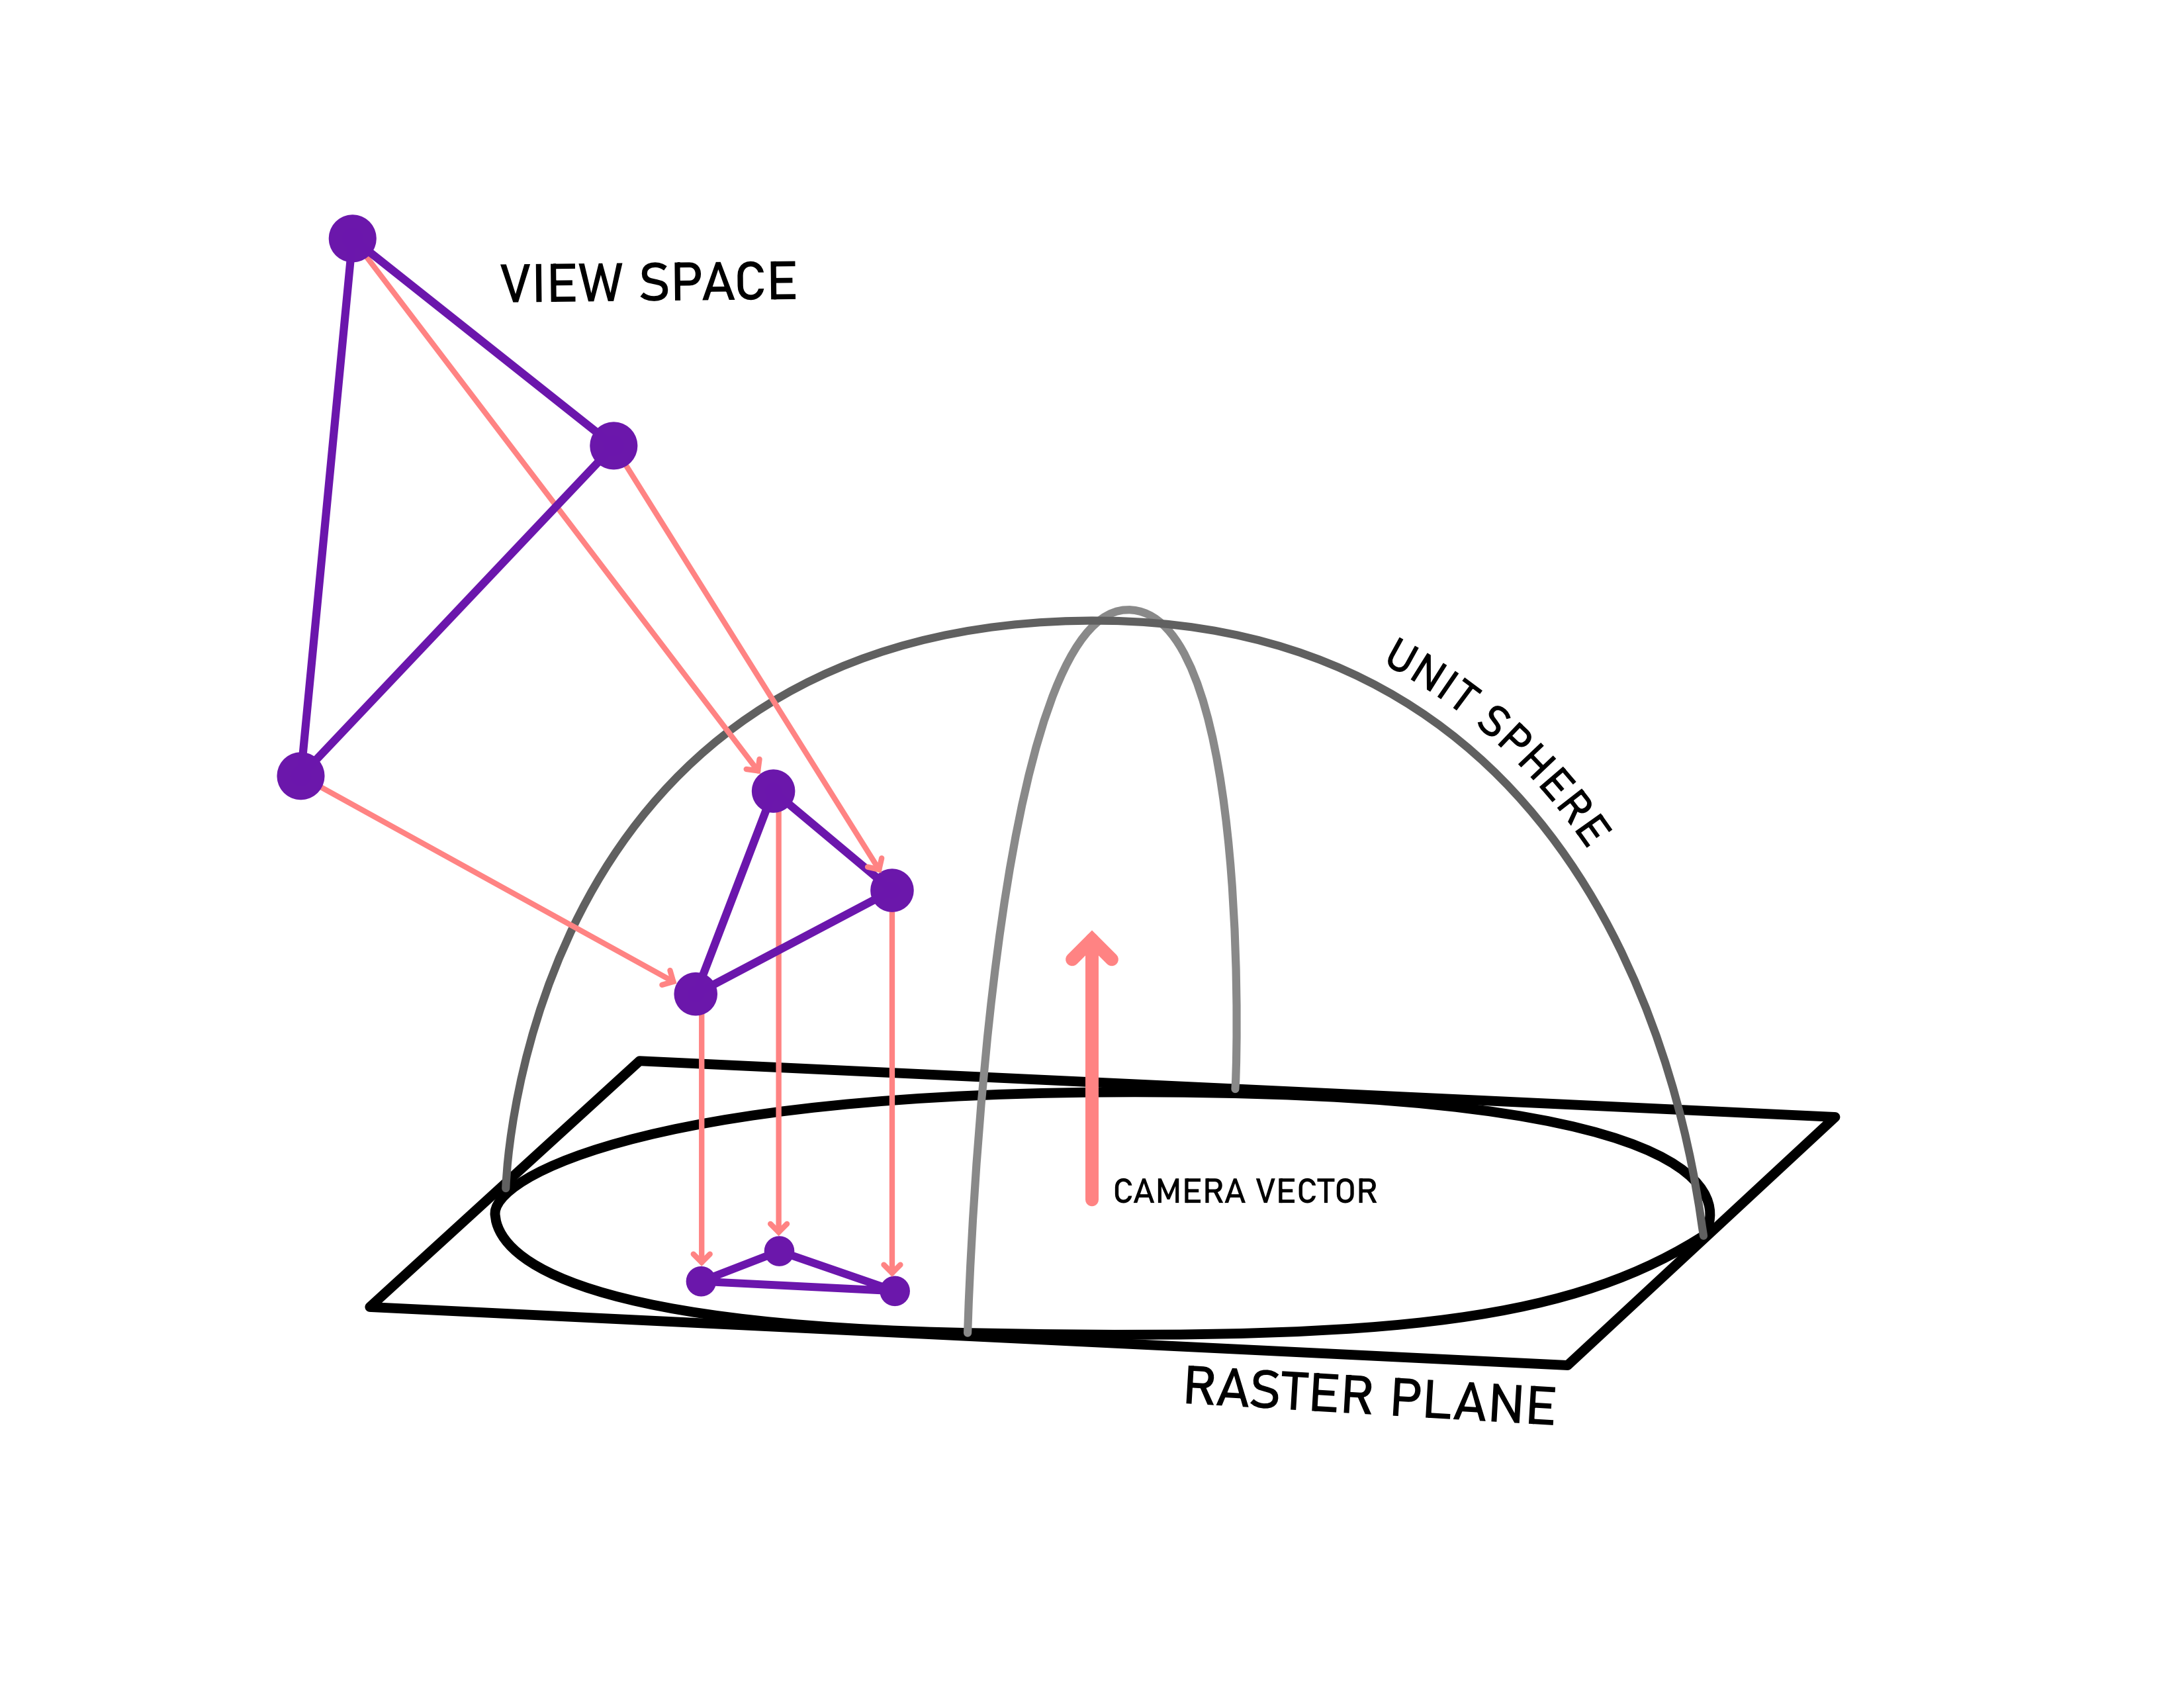
By a spherical projection, what I mean is that I just transform the scene to the view direction and then normalize the point vectors so that everything is projected to a unit hemisphere (while retaining original depth (magnitude) for the z-buffer), which is then projected onto the raster plane. That's it. And the only clipping plane that you have now is the plane aligned to the camera vector that cuts across the hemisphere. Now, at this point I'll admit that I haven't actually figured out how to clip this properly, so it's something that I need to come back to. It seems like it should be simple, but I haven't been able to eliminate some artifacts, so there seems to be something I'm missing. It turns out though that it's not that bad if you just don't clip it at all, actually. This is currently the source of a lot of the artifacts that I still have though, so it's something to improve in the future. It's suprisingly not that bad though (and fast!).
Rasterization/Shading
Finally we have the actual rasterization. Despite some compute rasterization being rather fancy, I ended up not doing that to start, just a typical loop over the bounding box of the triangle. Again, most of my triangles only cover a few pixels. For sorting I maintain a z-buffer, which is nice to have for some other effects as well. In order to write the color, I atomic min the new depth with the current depth at the pixel location, and use the resulting value to conditionally atomic exchange the color, which although seeming sketchy works well enough as other people have found. The depths and color for each pixel are stored as shared int arrays. At this point, I'm also "forward shading" using the vertex data to determine the color at the barycentric coord on the triangle, using a master shading function that selects the shader based on a material ID. I do this here primarily so that I can support transparency in the render, by blending with the current color instead of just exchanging it.
After the rasterization and shading is all done, I synchronize and then finally sum up the pixels to get the final irradiance color, which is written to the global vertex data buffer to be used by the (visible) mesh shader.
Dynamic Updates
In order to make this fast enough to dynamically light my huge landscape, I can't update every point every frame. What I did is pretty naive and definitely an area of improvement in the future, but it worked well enough for a dynamic sun. I maintain what is effectively a priority queue of points which need their lighting updated, which selects based on level of detail and distance from the player camera. Briefly the way this works is that another compute function creates a mask on points that need their lighting updated, and puts in them in a queue to be fed to the irradiance CS the next frame. There's additionally a limit on the number of points queued for update each frame, given as a configurable update rate. There's some logic that tries to figure this out and make sure that all the points get updated in a reasonable time. For far meshes, I additionally interpolate the lighting from a lower level of detail to a higher one, by using the barycentric coordinates of the higher LOD's points in the reference frame of its parent LOD triangle.
When a new lighting value is ready, the value is just linearly interpolated to the new one. At the moment, updates are done semi-asynchronously across points which are a source of temporal artifacts, and can look kind of funny, or cool depending on your perspective. It also uses, to put it charitably, "infinite bounces" currently.
Results:
Well, does all this actually work, and does it work fast enough to support a dynamic sun? To my delight yes it did.
If you'd like to download an executable, you can actually run around an old build for yourself here. No matter how much your compute units scream I promise it's not mining crypto. This is all built out as part of a game prototype in Luxe Engine, and the rest of the rendering pipeline is also built out from scratch. Feel free to take a look at it in renderdoc and wonder what in the world I was doing. It doesn't have some of the cool stuff I did later but it's been tested decently and should run well on most cards nowadays. This goes at ~120fps on my GTX3070, for reference. (Standard FPS controls, press R if you fall into a mysterious hole and can't escape.)


You can see the temporal "shimmering" artifacts very well when things are sped up in the video here.
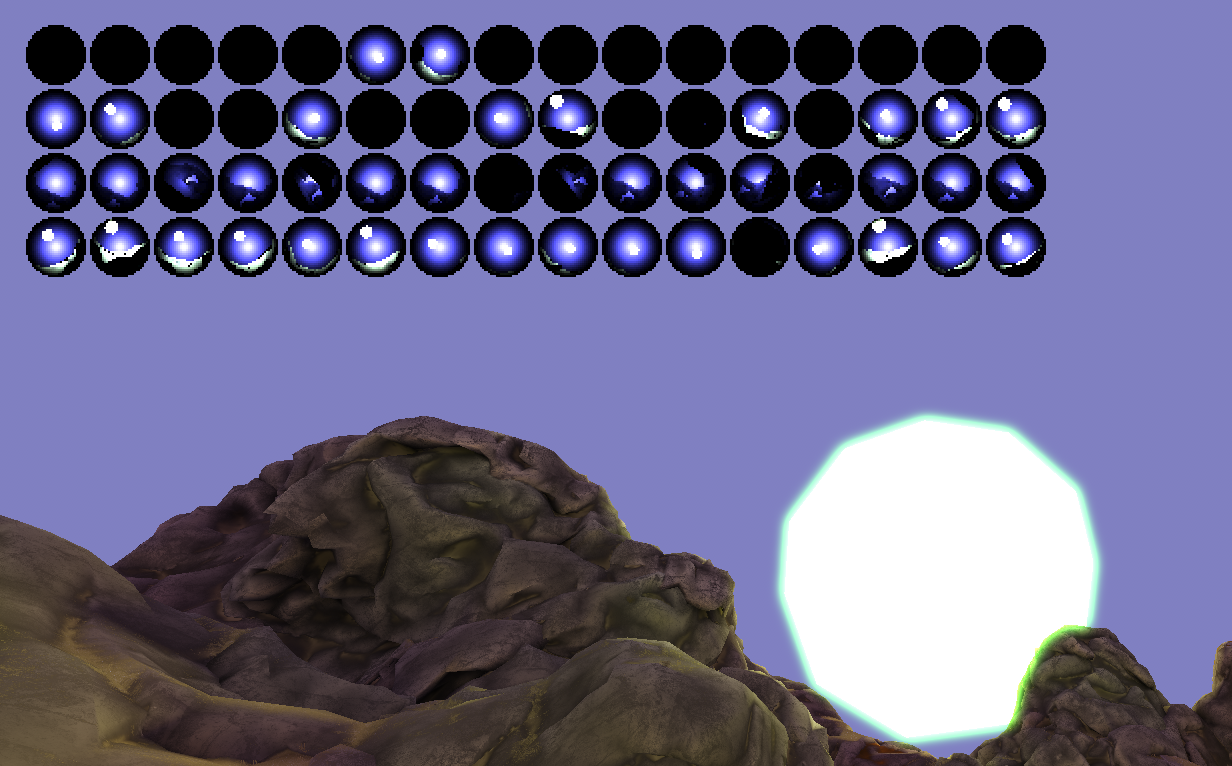
Some debug showing the actual little renders (in HDR).
Other Effects:
Atmospheric Lighting
One thing that I definitely wanted to try with this is atmospherics. Since rather than surface I want to equally sample a sphere and I don't need to do it with much detail, I actually ended up using a little ray tracing for this. I kind of do this "backwards" from a normal ray-tracer structure, as I take each triangle at the point I'd normally rasterize it and trace a handful of rays against it. To experiment I just keep things simple and render it using transparent meshes and a depth-fade shader. As with everything, it doesn't really get any special treatment and is treated as part of the scene with respect to the lighting, so it also naturally lights itself and the rest of the environment, gets shadowed, etc with no work. (This is why I like this system!) In these shots the atmosphere is dynamically lit with multiple "suns" of different colors.


Cloud-likes
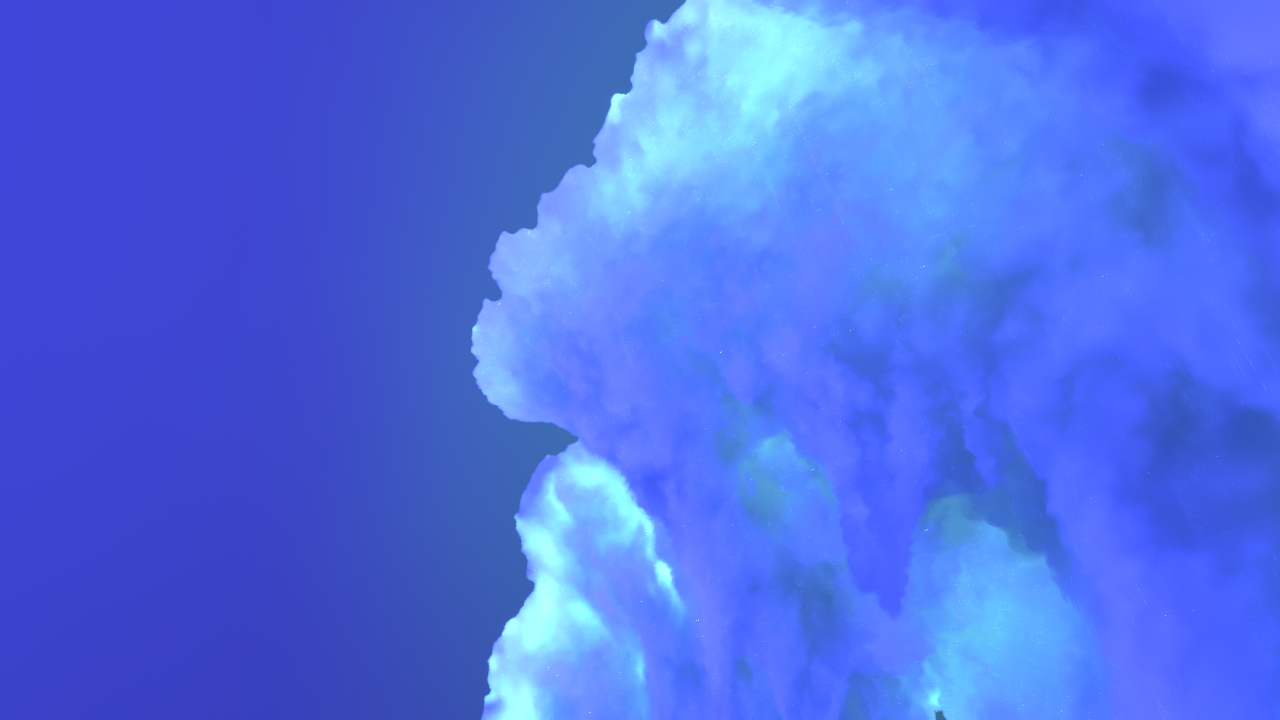
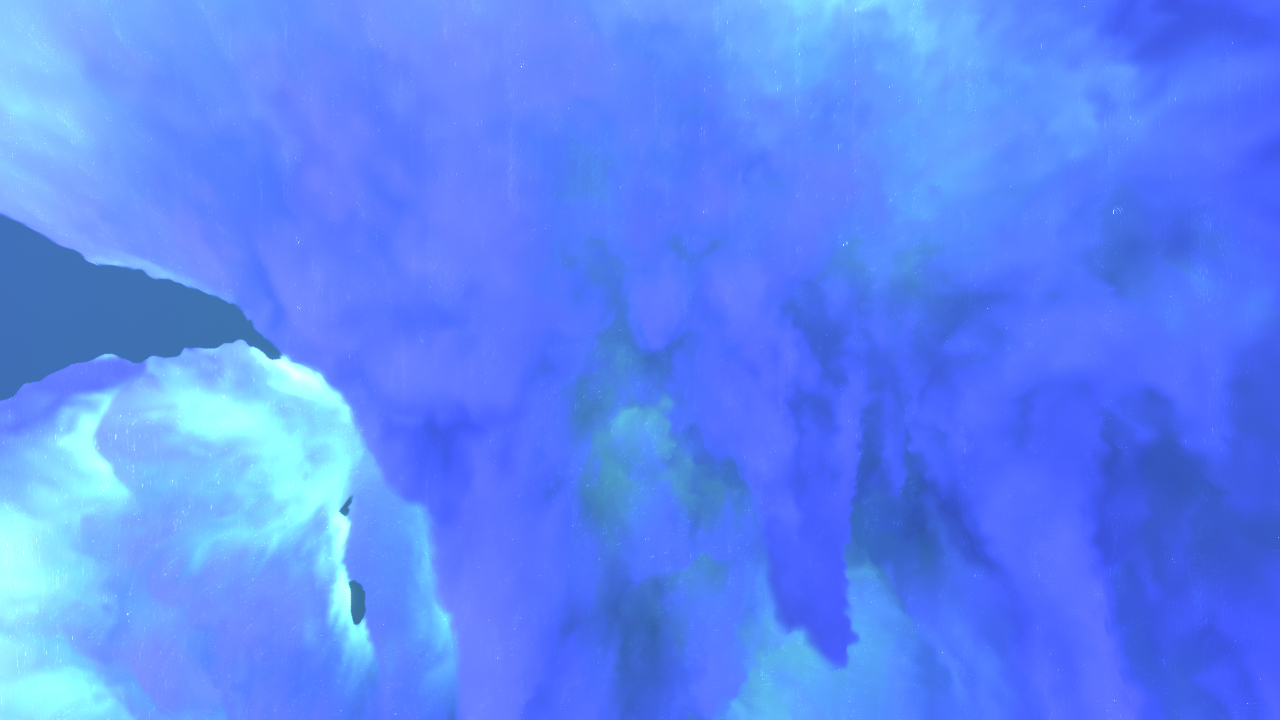
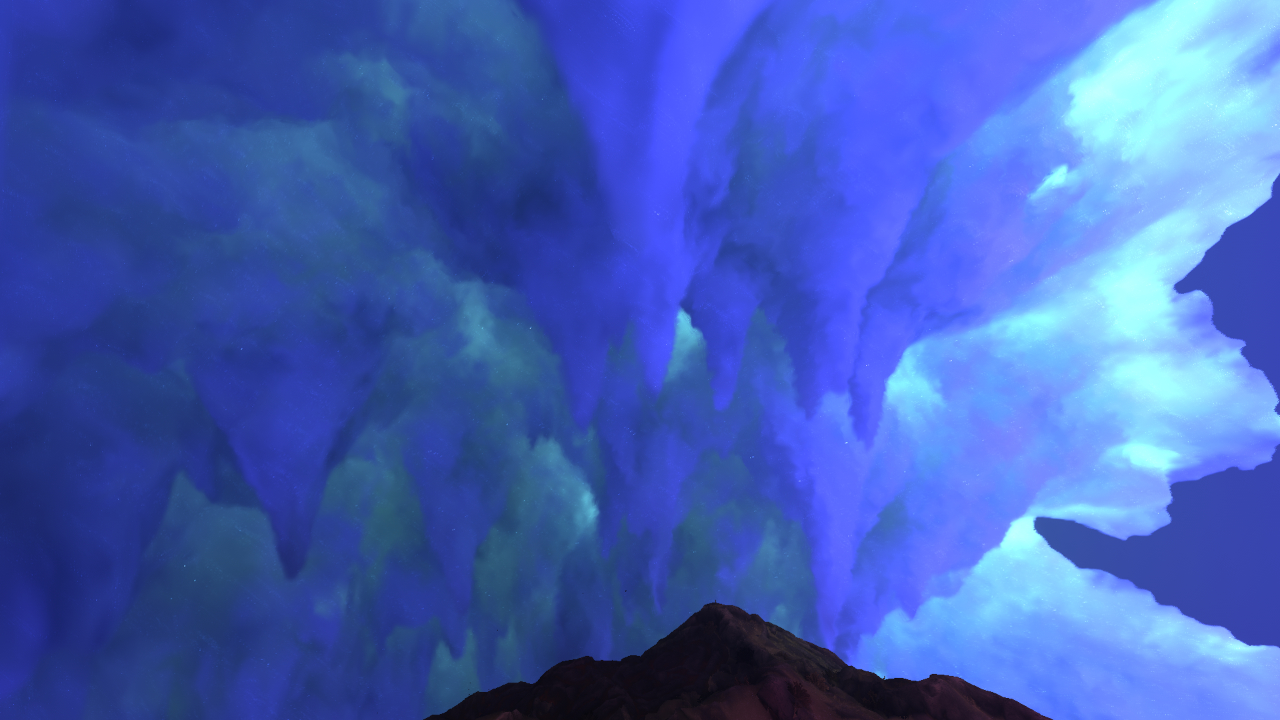
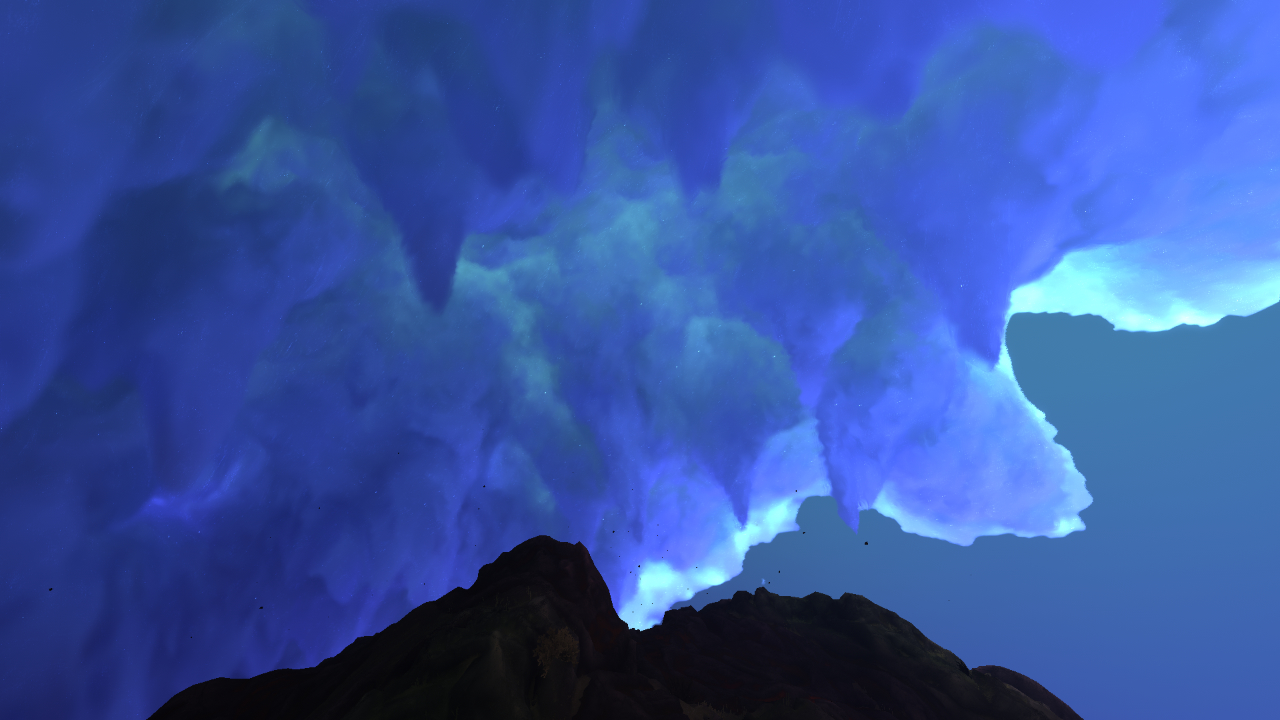
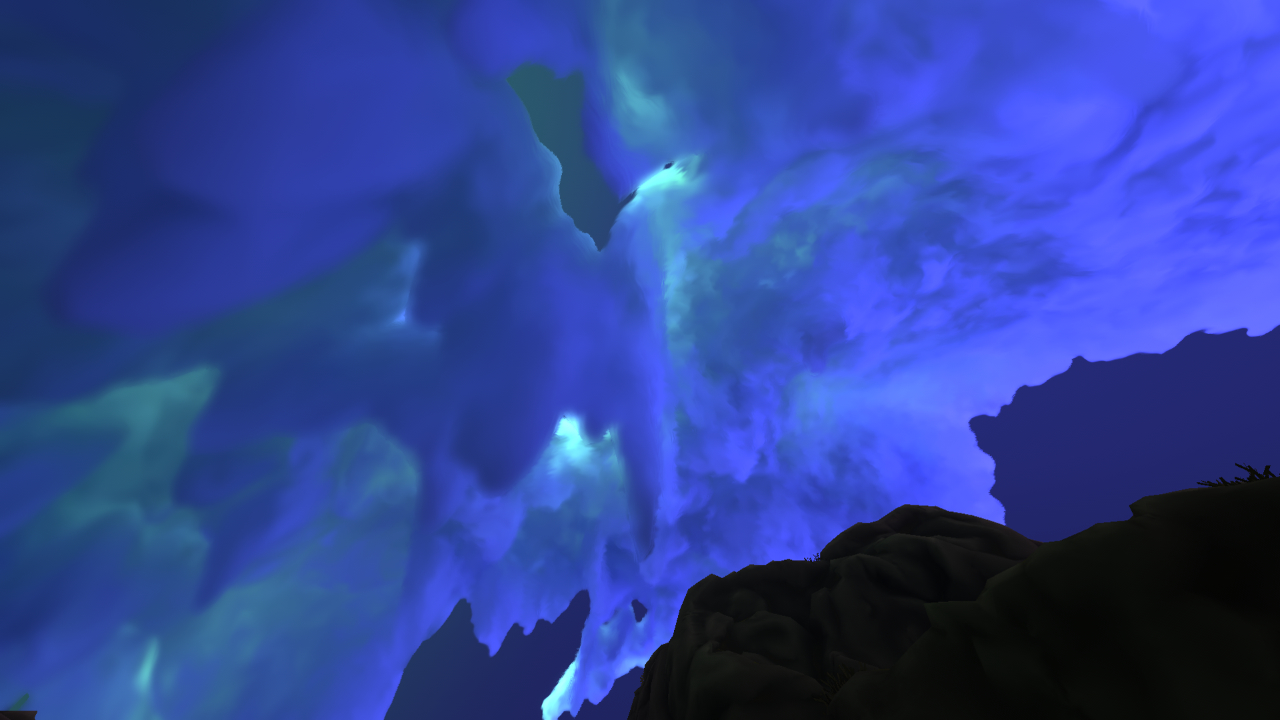
Something really cool I realized I could do is use my depth buffer for a translucency effect. In order to calculate the illumination through the backside of the mesh, I just render backwards into it and attenuate the illumination by the depth buffer values, which effectively map the mesh's thickness. By doing this I could actually get some pretty cool looking cloud-forms. For rendering these, I'm doing something similar to Sea of Thieves here, they are meshes that are rendered to an offscreen buffer, blurred and feathered with noise based on depth, and then composited into the frame.
In Practice
Here's some last screenshots with everything put together a bit further into the project, from when I was starting to actually try to make things "look good" a bit.
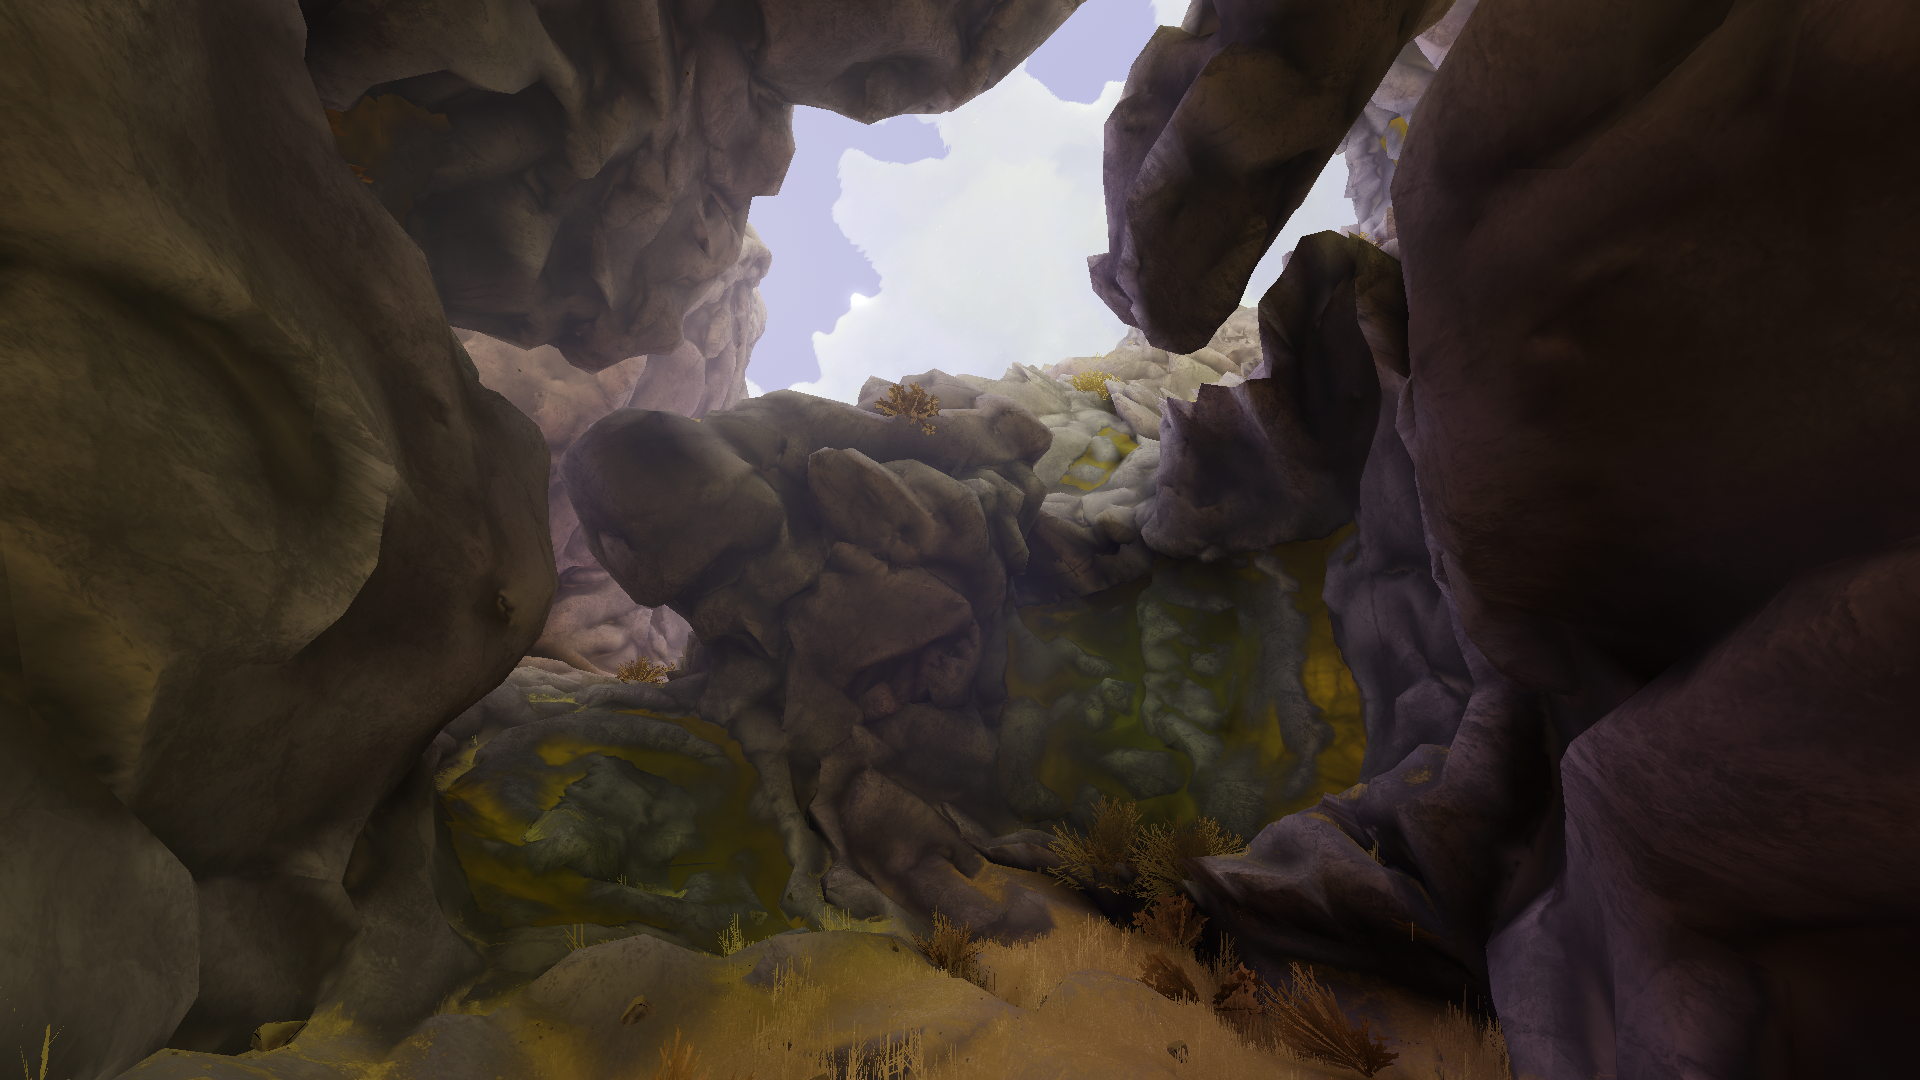
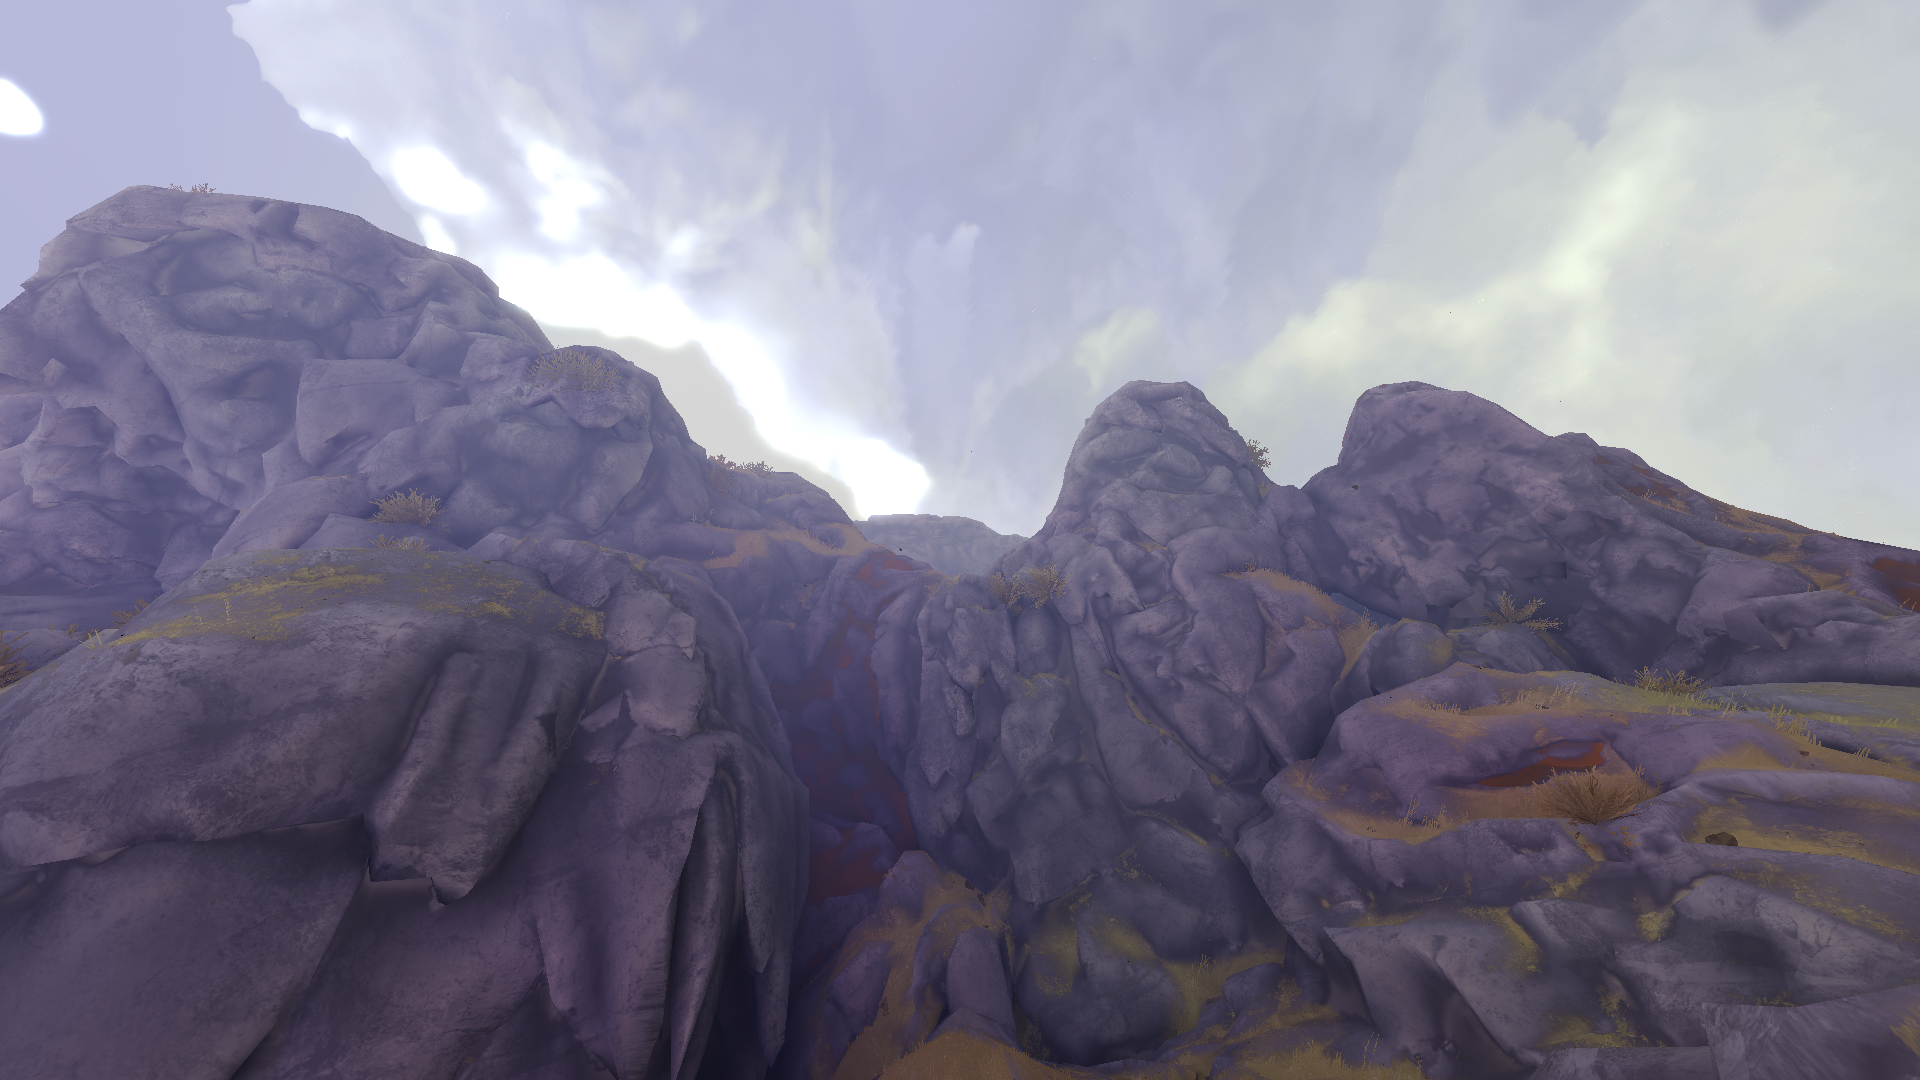
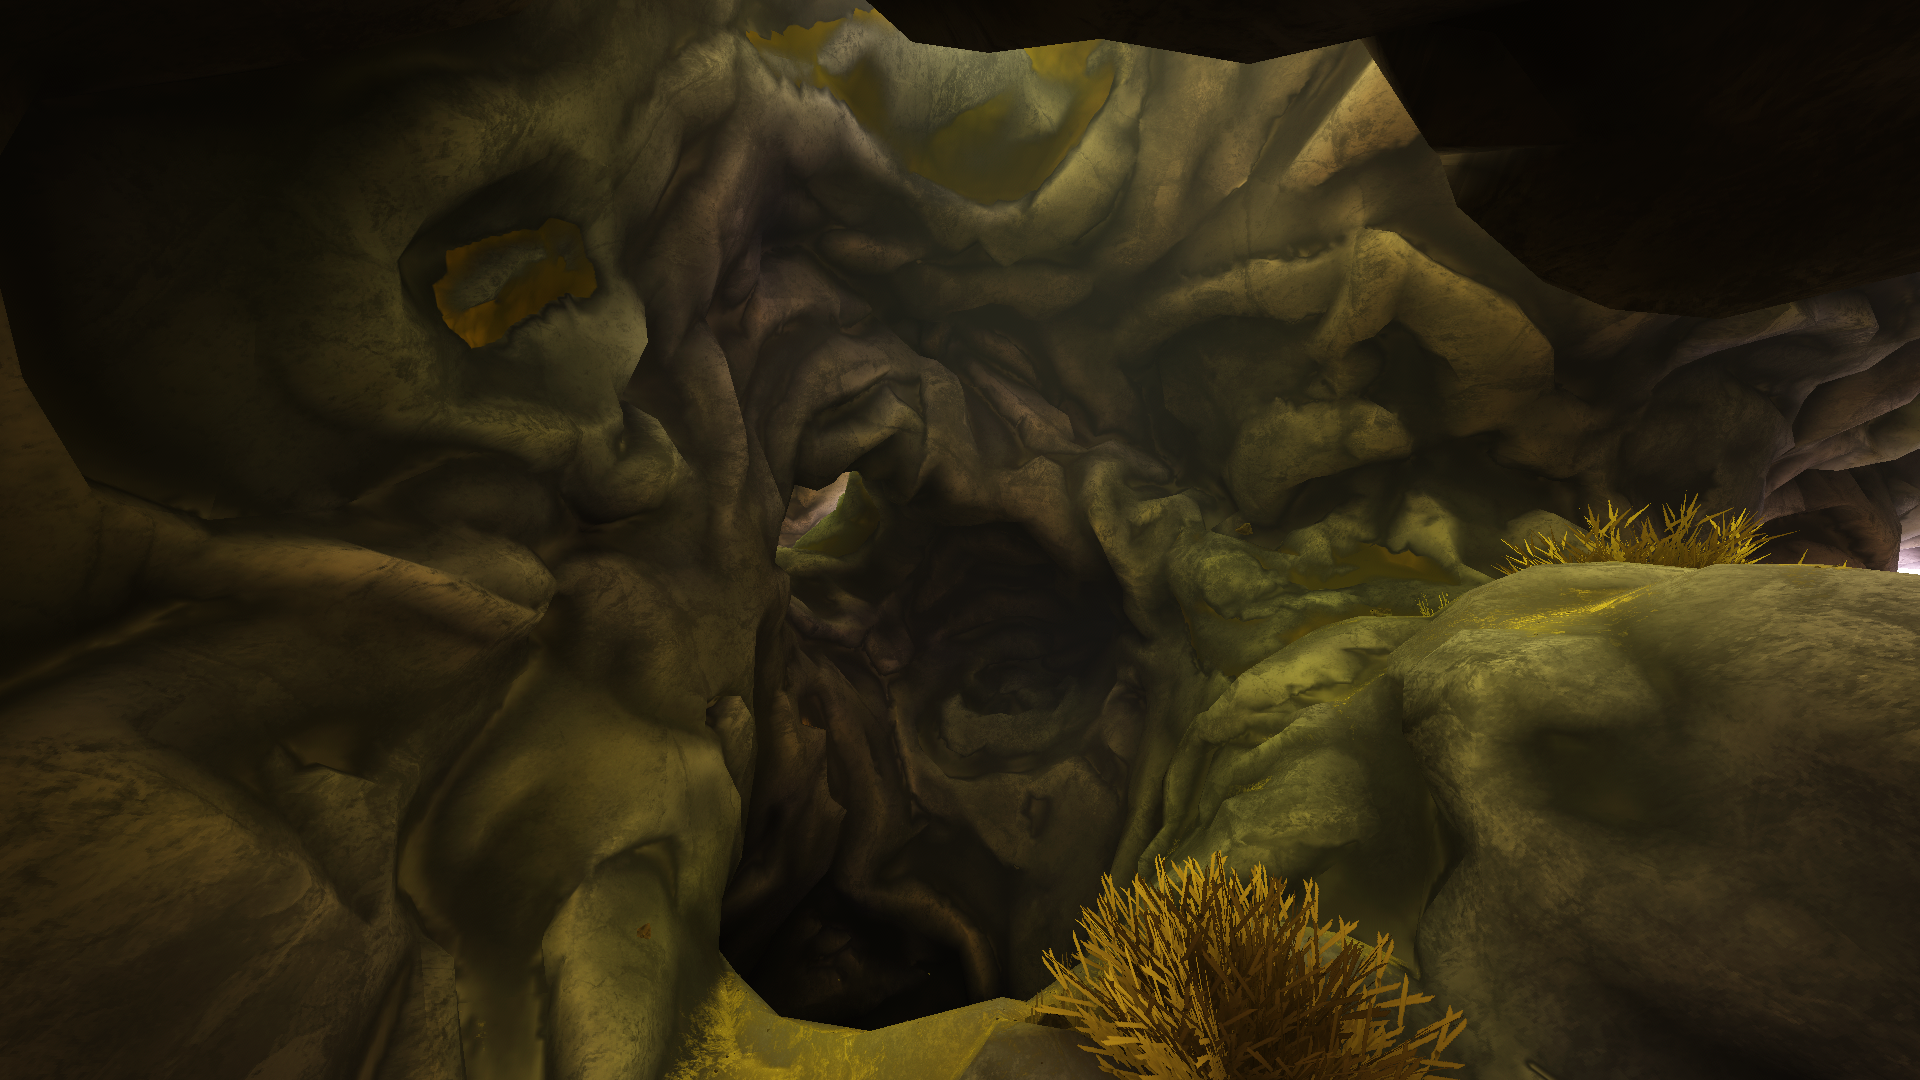
...It works! The art style I was going for with this was in fact a vertex lit, no-normal-maps kind of thing. So, normal mapping is not something that I ended up putting time into figuring out, but would be very interesting to do. There's plenty more that I could have done to make it "look good". For example, it's not like it's necessary to use this with vertex lighting, you could make it work with standard lightmaps as well. I developed this with the intention of using it for this project though, not showing it off.
Some Postmortem:
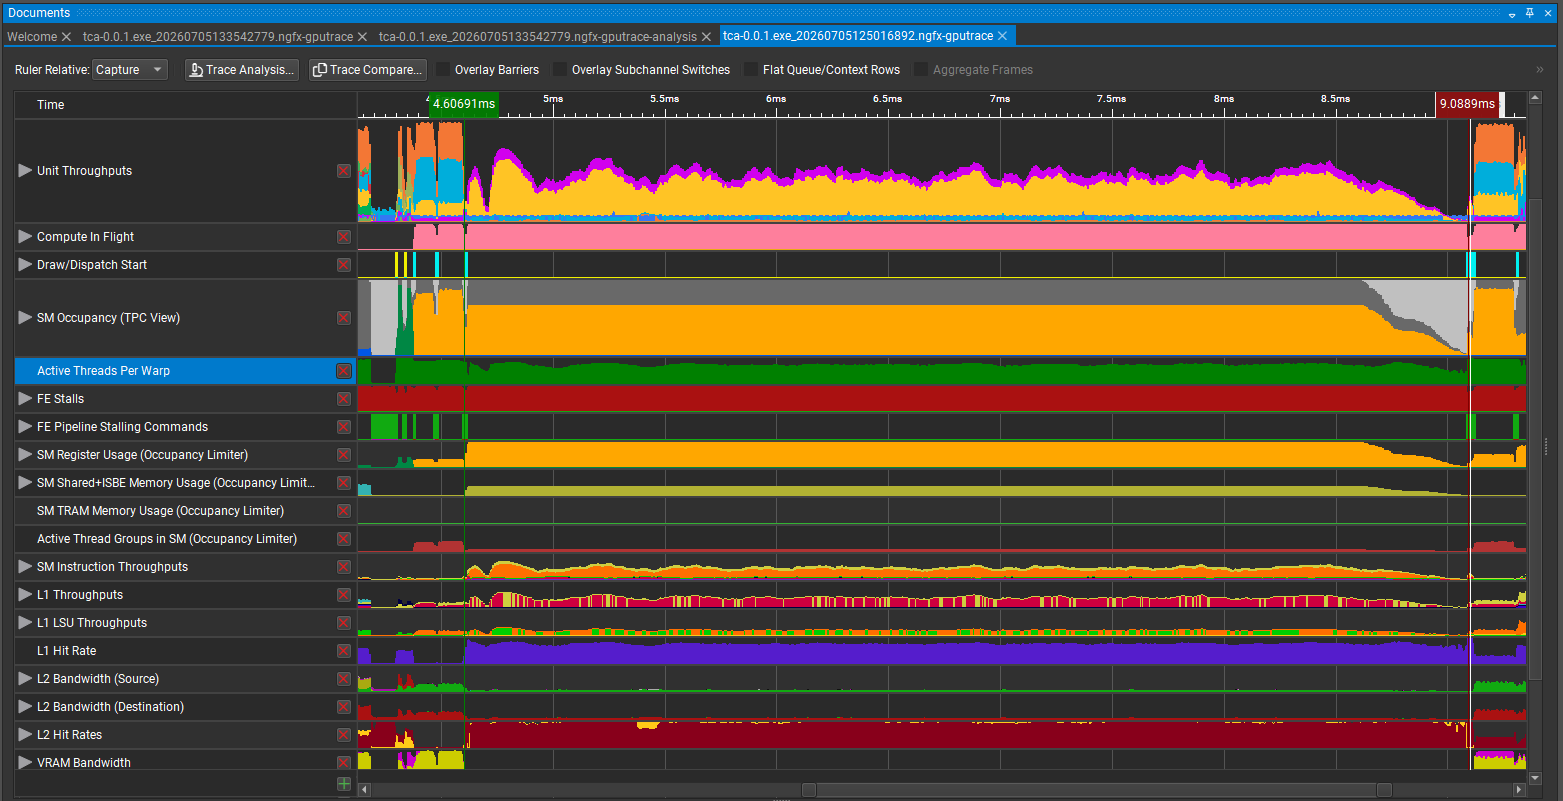
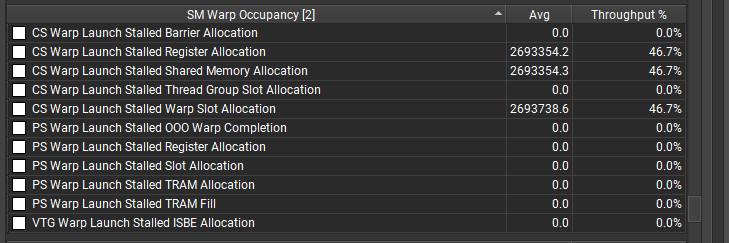
If I were to get back to this, there are a number of things that I have left to do to improve performance and make it more practical. For the former, I basically have not optimized the structure of the main compute kernel at all, though things look better than I expected. Thread coherence is actually at an average of 75%, L1/L2 hit rate is high. The thing that looks the most problematic to start is register pressure, which... definitely makes sense to me from the size of it. In NSight, we can see that register allocation is constantly at 100% and a lot of warps are being stalled on register availability. Although it's not guaranteed that the tradeoffs inherent in splitting it up into stages would result in an improvement, I think it would be worth experimenting with. I'd poke at it more with some A/B tests to determine what's going on in practice. Making some algorithmic improvements to the rasterizer would probably also help, as the performance scales most strongly with the average number of triangles rasterized per view currently. Aside from performance, I could improve the visual quality a lot by dealing with the remaining rasterizer artifacts.
Outside of the main algorithm, there are also a lot of content and other systemic improvements that I have yet to implement. For example, I don't have an actual (player-visible) LOD system working with it at the moment, so aside from subsampling the lighting down one LOD for far meshes as mentioned previously, it's calculating a lot more lighting than it needs to for detail that isn't visible. Aside from what's implemented already I'd also like to experiment more with a variable update rate based on distance, since with the workload I'm working with, the lighting is visibly laggy for dynamic meshes that are very close. Improving the whole dynamic update system to make that less hacky and reduce the visual artifacts it has would generally be nice, as well.
Really though, these are more artifacts of the vertex lighting setup I was trying to stick with. So I think the more interesting thing to do would be to plug it into a smarter, more standard GI sampling technique. (Even just try using it with lightmaps, for instance). Used in place of a standard GI system, it should already be more than fast enough as is. I'm mostly prioritizing performance improvements still because I'm trying to use it as the sole source of lighting in the scene (and because broad hardware support is important to me).
All together, I'm pretty satisfied that the basic idea more or less "just worked" as well as it did for my purposes. Implementing a whole raster rendering pipeline in a compute shader was very interesting to do and I learned a lot about the challenges there. Perhaps the most fun thing was how it forced me to think deeply about every fundamental part of the rendering process, and discard or rethink exactly what was needed for this application.
I developed most of this a few years ago so there's a lot more documentation that I'm missing and details that I didn't mention (or forgot...), but I hope that what I was able to write up was interesting and/or inspiring in some way.